Android Automotive OS is acquiring a lot more recognition as automotive organizations are seeking to provide their buyers with a far more personalized expertise. In this article we share our guideline to setting up the very first app for AAOS.
In advance of you begin, read our to start with post about AAOS and get to know our assessment to be knowledgeable of what to assume. Let us test building a basic Hi Planet application for android automotive. To get an IDE, go to Android Studio Preview | Android Builders and get a canary build:

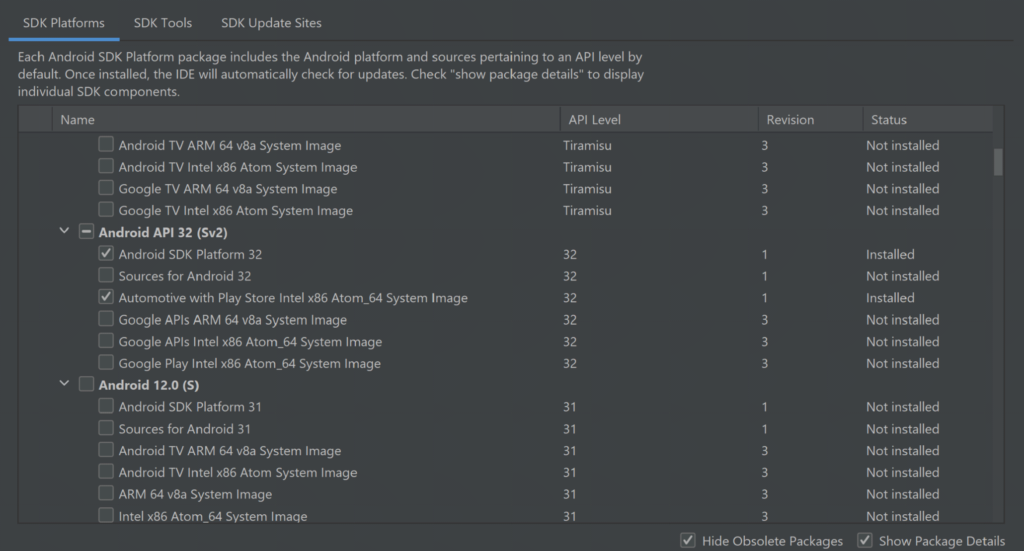
In the subsequent phase, put together SDK, verify and down load the Automotive program image in SDK supervisor. You can get any from api32, Android 9, or Android 10, but I do not recommend the newest just one as it is incredibly laggy and crashes a large amount proper now. There are also Volvo and Polestar illustrations or photos.
For those you have to have to add backlinks to SDK Update Internet sites:
https://developer.volvocars.com/sdk/volvo-sys-img.xml
https://developer.polestar.com/sdk/polestar2-sys-img.xml
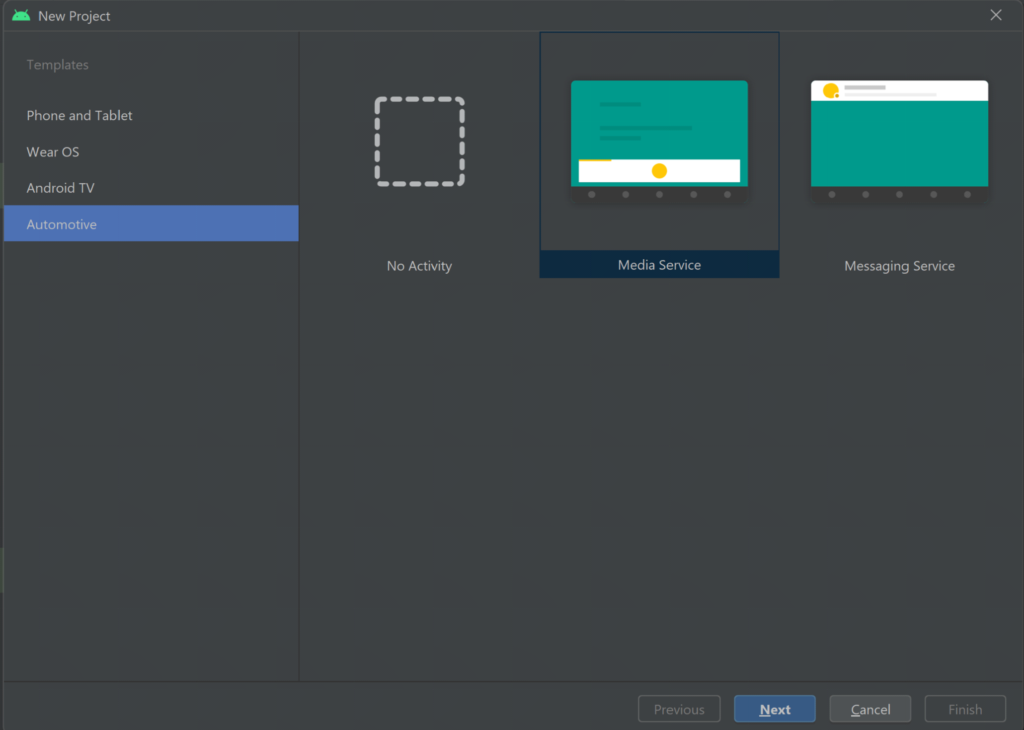
Begin a new undertaking, go to File> New Task and choose automotive with no action
A great and thoroughly clean job ought to be developed, devoid of any courses: Go to build.gradle and incorporate the motor vehicle app library into dependencies, refresh the challenge to make it get
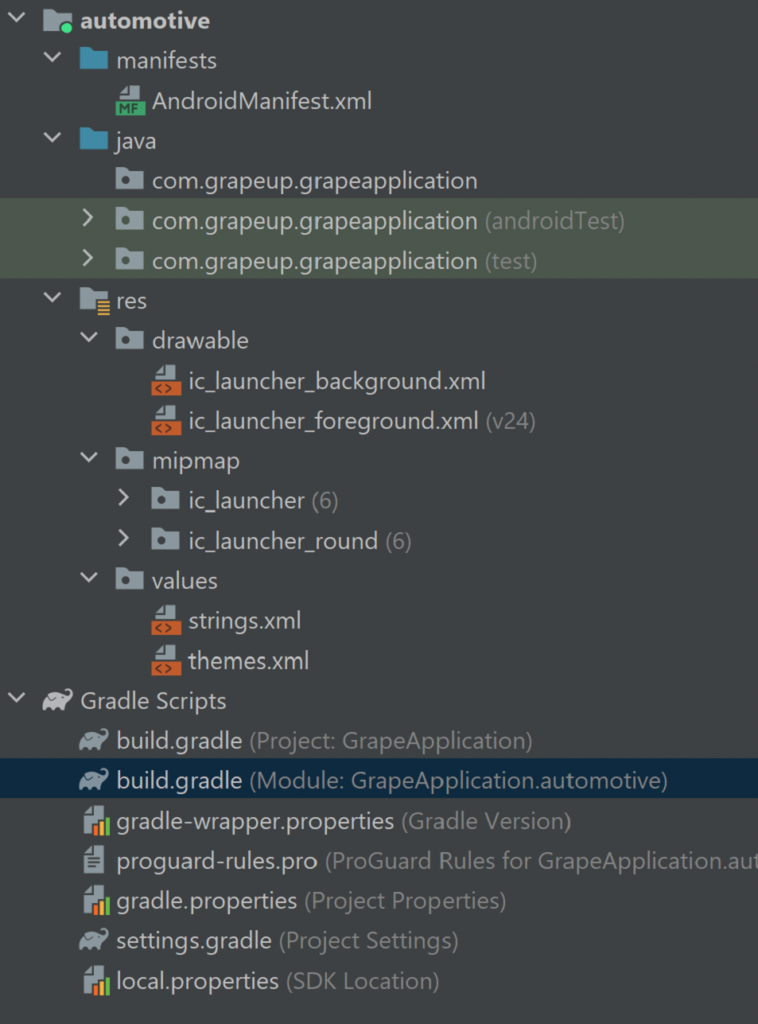
our new dependency:
implementation "androidx.automobile.application:application-automotive:1.2.-rc01"
Let us generate some code, very first our display course. Name it as you want and make it lengthen Display screen course from android.auto.application package deal and make it put into practice necessary techniques:
general public class GrapeAppScreen extends Display screen
public GrapeAppScreen(@NonNull CarContext carContext)
tremendous(carContext)
@NonNull
@Override
general public Template onGetTemplate()
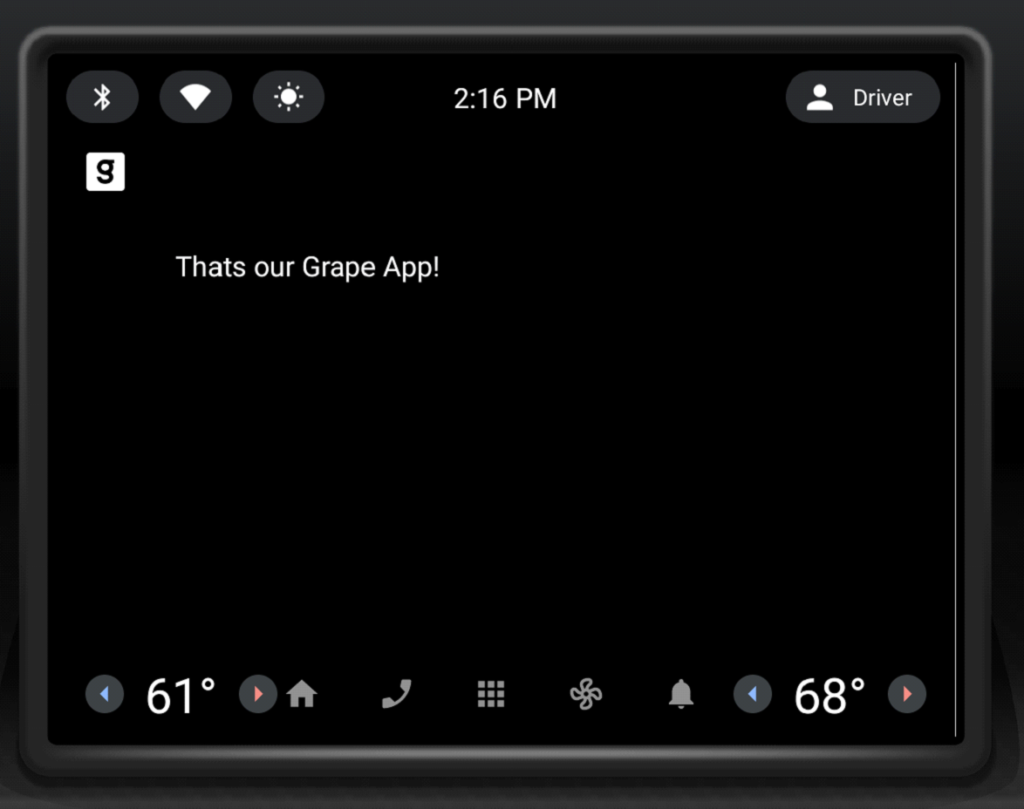
Row row = new Row.Builder()
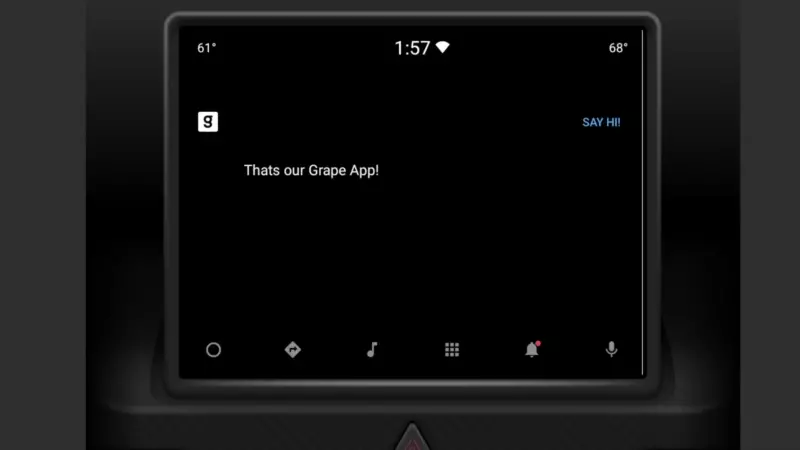
.setTitle("Thats our Grape Application!").create()
return new PaneTemplate.Builder(
new Pane.Builder()
.addRow(row)
.develop()
).setHeaderAction(Motion.Application_ICON).make()
That must build a basic display with our icon and title, now make yet another class extending CarAppService from the identical offer and as nicely make it put into practice the necessary procedures. From createHostValidator() method return a static one that makes it possible for all hostnames for the reason of this tutorial and return manufacturer new session with our display in onCreateSession(), pass CarContext making use of Session class getCarContext() method:
community class GrapeAppService extends CarAppService

   general public GrapeAppService()

   @NonNull
   @Override
   general public HostValidator createHostValidator()
       return HostValidator.Enable_ALL_HOSTS_VALIDATOR


   @NonNull
@Override
public Session onCreateSession()
   return new Session()
       @Override
       @NonNull
       community Display screen onCreateScreen(@Nullable Intent intent)
           return new GrapeAppScreen(getCarContext())
Following, transfer to AndroidManifest and insert various options within the principal manifest tag:
Within the Application tag incorporate our provider and action, do not neglect minCarApiLevel as absence of this will throw an exception on application begin:
Now we can add our application to the system, verify that you have an automotive emulator created, use automotive configuration, and hit operate. The application is operate in Google Automotive Application Host, so if it is your initial software on this system, it may possibly involve you to get to the participate in retail outlet and get it.

Which is how it looks:
The very last factor, we’ll add a navigation button that will pop a Toast. Modify onGetTemplate() in Monitor course, include Motion and ActionStrip:
Action motion = new Action.Builder()
       .setOnClickListener(
               () -> CarToast.makeText(getCarContext(), "Good day!", CarToast.Size_Limited).demonstrate())
       .setTitle("Say hi!")
       .make()

ActionStrip actionStrip = new
Incorporate it to PaneTemplate:
return new PaneTemplate.Builder(
       new Pane.Builder()
               .addRow(row)
               .make()
)       .setActionStrip(actionStrip)
       .setHeaderAction(Action.Application_ICON)
       .establish()
That’s our HelloWorld app:
Now you have the HelloWorld example application up and jogging applying Car App Library. It usually takes care of exhibiting and arranging almost everything on the monitor for us. The only duty is to increase screens and steps we would like to have(and a little bit of configuration). Check out the Motor vehicle application library to examine a lot more of what can be performed with it, perform all-around with creating your application, and absolutely check our website before long for much more AAOS app development written content.


 Complete Guide for Simple Setup")

More Stories
Crypto Millionaires: Success Stories and Strategies from the Digital Frontier
Crypto Security: Safeguarding Your Assets in an Evolving Landscape
The Future of Finance: How Cryptocurrency is Revolutionizing Transactions